Have you ever ridden a skateboard? Whether the answer is yes or no, this game is for you. Dodge obstacles, pass levels, beat your records, learn programming and learn about LCD screens while you play. Sounds good, right? Then let's get started.
If you want to learn how to build this project in a simple and quick way, stay on this page.
Table of contents
Game explanation, objective and how it works
The objective and gameplay of this mini game are very simple. The game consists of dodging the obstacles that appear on the screen, each time at a higher speed.
To do that, we press a button that makes our skate character jump and avoid the obstacle. Of course, it is not that easy because you have to time the jump correctly, and after every obstacle there are always more coming.
Like the idea? There is more. By building this project, you will also learn how LCD screens work, which have many practical uses in Arduino projects. It is something well worth understanding.
Let's get started.
Materials used in the project
The materials used in this project are very simple and should be easy to find. To make things easier, here is a list of all the components.
Below you can find a list of purchase links.


As an Amazon Associate, RobotUNO earns from qualifying purchases.
WE DEVELOP YOUR IDEA
Need help with a project?

- Prototyping and MVPs
- Arduino and ESP32
- PCB design
- 3D part design
- Bluetooth connectivity
- Feasibility study
- Cost optimization
- Technical consulting
- Internet of Things
- Patent support
Step-by-step project video
If you want a more detailed walkthrough of how to build this project from start to finish, including a code explanation, the video below covers everything in a more visual and easier-to-follow way. And if you enjoy this kind of content, do not forget to subscribe.
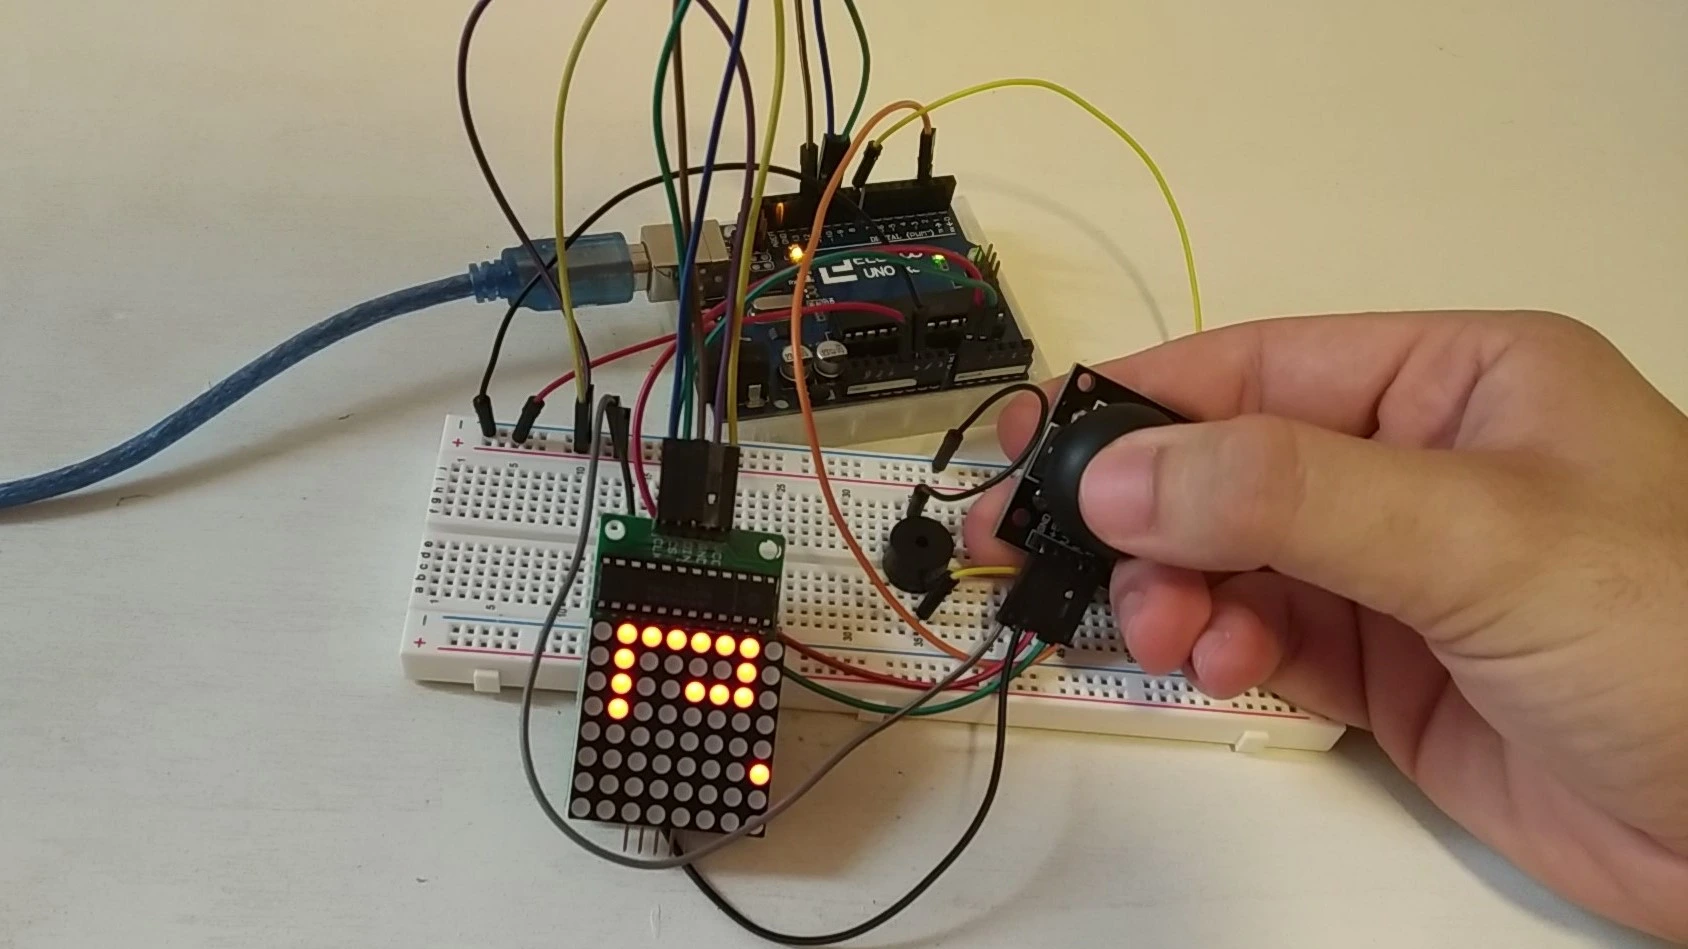
Arduino wiring diagram for this project
To make the assembly easier, here is the wiring diagram. All the connections shown here match the code placed just below, so make sure your wiring is exactly as shown in the image.

Arduino code for the project
Below you can find the Arduino code developed specifically for this project. The pins used in the code are the same ones shown in the wiring diagram above.
If you want a more detailed explanation of the different parts of the code and how the game works, we recommend watching the video above.
Using this code is very simple. You just need to copy it and paste it into your Arduino compiler, for example the Arduino IDE. If you do not have it installed yet, here is our guide on how to install it for free.
If you have any questions, leave a comment on this page and we will reply as soon as possible.
//Canal -> RobotUNO
//Minijuego con pantalla LCD
#include <LiquidCrystal.h>//libreria de la pantalla
LiquidCrystal lcd(12, 11, 5, 4, 3, 2); //Configura los pines de salida para la lcd
byte letra1[8] = { B01110, B00100, B11111, B01110, B01010, B01010, B11111, B01010 };
byte letra2[8] = { B01110, B00100, B11111, B01110, B11011, B00000, B11111, B11111 };
byte letra6[8] = { B01110, B10101, B11111, B01110, B01010, B01010, B11111, B01010 };
byte letra0[8] = { B00000, B00000, B00000, B00000, B00000, B00000, B00000, B00000 };
byte letra3[8] = { B00000, B00000, B00000, B11111, B11111, B11111, B11111, B11111 };
byte letra4[8] = { B00000, B11111, B11111, B11111, B11111, B11111, B11111, B11111 };
byte letra5[8] = { B01110, B11111, B11111, B11111, B11111, B11111, B11111, B11111 };
int x=15;
int y=1;
int obstaculos=0;
int vel=300;
int puntaje=0;
int GameOver=3;
void setup(){
  lcd.begin(16, 2);
  lcd.createChar(1, letra1);
  lcd.createChar(2, letra2);
  lcd.createChar(3, letra3);
  lcd.createChar(4, letra4);
  lcd.createChar(5, letra5);
  lcd.createChar(0, letra0);
  lcd.createChar(6, letra6);
}
void loop(){
  lcd.setCursor(7, 0); //Posición del nombre del canal
  lcd.print("RobotUNO");
  lcd.setCursor(0, 0); //Coloca el numero 0
  lcd.print(obstaculos);
  lcd.setCursor(x,y);
  lcd.write(byte(3));
  delay(vel);
  lcd.setCursor(x,y);
  lcd.write(byte(4));
  delay(vel);
  lcd.setCursor(x,y);
  lcd.write(byte(5));
  delay(vel);
  lcd.clear();
  lcd.setCursor(GameOver, 1);
  lcd.setCursor(3, 1);
  lcd.write(byte(1));
  if (digitalRead(7) == HIGH){
    lcd.setCursor(3, 1);
    lcd.write(byte(0));
    lcd.setCursor(3, 0);
    lcd.write(byte(2));
  }
     else if(3 == x){
      lcd.clear();
      lcd.setCursor(3, 0);
      lcd.print("Game Over");
      lcd.setCursor(7, 1);
      lcd.write(byte(6));
      delay(3000);
      puntaje=obstaculos;
      lcd.setCursor(3, 1);
      lcd.print("Puntaje:");
      lcd.setCursor(12, 1);
      lcd.print(puntaje);
      delay(6000);
      obstaculos=0;
     }
   x=x-1;
  if (x<=0) {
     x=15;
  }
 vel = random(1,200);
if(GameOver == x){
  lcd.clear();
  obstaculos++;
}
}